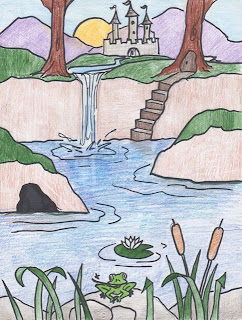
This is another great project with a nice balance of freedom and structure. This is also great because it is easily taught with just pencil and paper.

The first part we will draw is the foreground. If you were walking along, and discovered this pond, the first things you would reach would be the plants and stones along the bank. You can draw anything you want here at the bottom of the page.
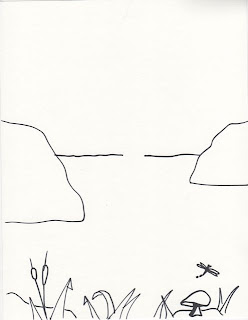
If you had a boat or raft, you could sail into the middle ground. This whole area is the surface of the water. We can add logs or boats or water lilies latter. It's important that the line that indicates the end of the water is higher than the islands. Otherwise the islands would be hovering over the water!
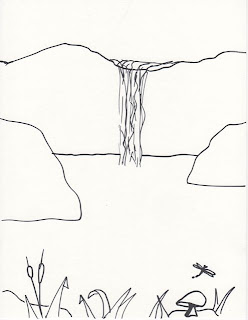
We will draw another line across the paper for the top of the waterfall. From this angle we can't really see the rest of the stream above the waterfall, just as you can't see the water in a cup if you hold it higher than your head. Sketchy lines are all we need to draw the waterfall.
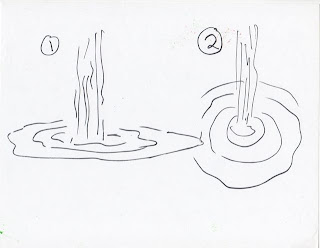
The best way to make the pond really look like water, is to add all the ripples. However, it's very important to get the perspective right. Which one of these waterfalls looks better for our picture? You can refer to my lesson on foreshortened circles.
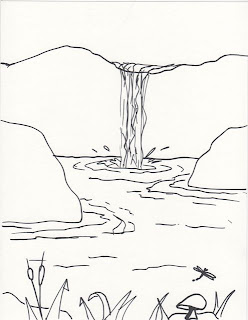 If your boat took you all the way across the pond, and you were able to climb up the cliff, you could keep going on your adventure. What would you see?


how would you go about putting moss on the side of the wall
ReplyDeletethank you so much i had a portrait for art and i wanted to do a waterfall in the back ground this helped allot!
ReplyDeletehard I AM EIGHT YEARS
ReplyDeleteThanks for the tips this is brilliant
ReplyDelete