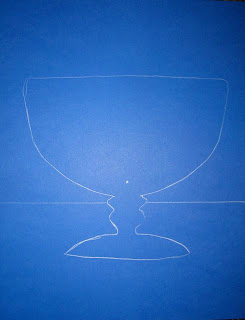
Teach vanishing point, symmetry, use of light, and contour lines all in one very popular project (though not all in one lesson)! This is one of my all-time favorites!
Materials:card stock for making stencils
scissors
drawing pencils or erasable white colored pencils
prismacolor colored pencils (one white pencil for each student)
dark colored card stockrulers
ice cream dish to hold up to the light (pick some up at Goodwill)
optional double sided tape
Step 1 Symmetry
Have the students cut out a stencil.
The students fold a sheet of card stock in half in a "hamburger fold"(as opposed to a hot dog fold).
As long as the student have a base, a stem and a cup, they always end up looking great. I would encourage them to draw a wavy rim at some point. One parent commented on the martini glass her child had drawn in art class!
Step 2
Cut out the stencil and trace it on the card stock.
Some children will need it held in place with small pieces of double stick tape. Pat it between you fingers a few times so that it's not too sticky!
Draw the far edge of the table and the vanishing point.
Draw points along the bottom about 1.5 inches apart.
Draw lines dot-to-dot with a ruler or the edge of a paper. The students have a very hard time trusting the vanishing point. Especially as they need to stop as soon as they hit the dish.
After the lines that touch the bottom are complete the students have to judge where to put the lines along the sides. They can usually get it right after I demonstrate the trial and error of adding lines too close and then too far apart.
Add vertical lines to finish up the checkerboard effect. As the lines get farther away they get closer together. Don't make too big a deal of this as it might frustrate the students. Instead of getting technical, I demonstrate with the same trial and error approach. The students can always tell me what looks right.
HAVE THEM BE CAREFUL WHEN COLORING THE CHECKERBOARD PATTERN. IT'S SOOO EASY TO MESS UP THE PATTERN. IT'S VERY IMPORTANT TO COLOR IN THE SQUARES SYSTEMATICALLY.
Round out the top and add a double line for the thickness of the glass. I explain that the ice cream doesn't drain all the way into the base, because the stem and base are solid glass.
Step 4 Contour Lines
(This part might be a good way to start a new class)
In order for students to add the glass shine correctly, they must have an intuitive understanding of contour lines. There are a lot of good lessons out there for this. Check out my hot air balloon lesson.
Have the students trace their stencils on a separate piece of paper and practice adding lines that define it's 3D shape.
Step 5 Observation of Light
Hold up a glass ice cream dish and help them see the way the light shines.
The students add random highlights. I tell them i need to see thick and thin, long and short, bright, medium, and soft.
Sometimes I have the students do the same with a dark blue or gray colored pencil for contrast.
Now for the fun part! Let the students create an amazing sundae. Don't forget to show and tell!


No comments:
Post a Comment