These canes feature the cross stitch tutorial and the argyle tutorial available from my etsy shop!
Saturday, February 18, 2012
Friday, February 17, 2012
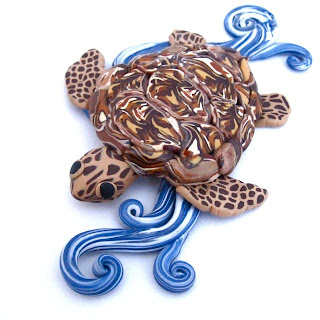
Sea Turtle Birthday Party Project: How to make fimo sea turtles
Learn how to make this cane in my previous post!
See pictures of the kids' finished sea turtles at Polymer Clay Workshop on Facebook.
How to make a polymer clay cane with a sea turtle shell pattern!
1) Chop up a bunch of colors that look cool together. Next time I think I would use brighter, crazier colors.
2) Roll it out and maybe fold it once or twice and roll it out again until you have one smooth log of clay.
3) Slice it into four or five equal pieces.
4) Pinch the top of each piece so that the end looks like a triangle. If there is part of the cane that seems to have darker colors, be sure that part up into the point. We're trying to get that look of each individual scale of the shell where it has a dark radial pattern like the rays of a rising sun.
5) Bring all the pointed ends together (here the pattern is upside-down).
Learn how to form them into sea turtles in my next post.
Thursday, February 9, 2012
Wednesday, February 8, 2012
How to form triangle quilt blocks for polymer clay cane work: fimo tutorial
Find the patterns and complete tutorial for $5 at my esty shop.
Here again, I've tried to find the simplest way to form shapes without an extruder (see rectangular blocks or hearts). In this case, it would be impossible to use an extruder because I want to keep the "fabric" pattern of the triangle in-tact. The trick to creating beautiful quilt canes is for the sections to have mixed colors as if they were patterned fabric. You can use multiple canes, or just mix colors, as long as the pattern won't be disturbed by squishing it into a triangle.
There are countless quilt blocks that can be made by arranging square canes divided into triangles. Sometimes I even make up the squares before I know what pattern I'll use. I just keep slicing, staking, and re-arranging the square canes. It's so much fun, and the result is beautiful! I like to make these square canes fairly large (much larger than pictured) and then reduce them. This way I can make lots and lots to play around with by only forming the triangle once!
As long as you have the same amount of each color side by side, they will form pretty good triangles when squished into a square. Be sure to pinch squares so that the colors meet perfectly at the corners. This may take a little practice, but trust me, it works better than you'd think. I don't know why I spent so many hours extruding tiny triangles! Also, once the square cane is formed, you can push it all pull it (to even out thick and thin) while you line them up with other canes, so even if the aren't perfect to begin with, you can just force them into place when the time comes.
Please visit my etsy shop for more tutorials, ideas, and supplies!
Polymer clay miniature cross stitch millefiori cane: unique fimo pattern/design
I've been working on this technique for at least a month! I think this last one looks amazingly realistic, but somehow the original heart was more adorable. There are still a few details I'd like to tweak, and new patterns I'd love to try, so stay tuned. See the original cross stitch heart used in this Valentine's Day quilt!
How to form a polymer clay square cube or rectangular block for cane work without a pasta machine or extruder
Yesterday I posted about how to make a heart shape.
This is how I form a rectangular block. I've seen it done with layers from a pasta machine, but sometimes I don't feel like getting mine out and cleaning it up afterward. You might look at this and think, sure, that works if you can roll out clay in even tubes! Not always an easy task. However, the slight irregularities in the rolls of clay are averaged out when you stack them up like this. This works with as few as four tubes, but the more you make, the firmer it will seem.
Also see quilt blocks.
Find more tutorials, supplies, and project ideas at my etsy shop.
Tuesday, February 7, 2012
Intricate Celtic Knot Cane out of Polymer Clay
I wasn't completely pleased with this cane at first, and then I discovered that I could make all of these designs with just this one cane!
You can purchase canes and tutorials at my etsy shop.
How to form a polymer clay heart cane without and extruder: fimo canework tutorial pattern
You can surround the heart using any technique you want. I chose these rolls of clay because I wanted to keep the mottled background color as consistent as possible. I love this technique because I didn't have to reduce the cane much, and because I didn't have to use an extruder!
Also see my technique for rectangular blocks and quilt blocks!
For canes and tutorials, please visit my etsy shop!
Subscribe to:
Posts (Atom)


